
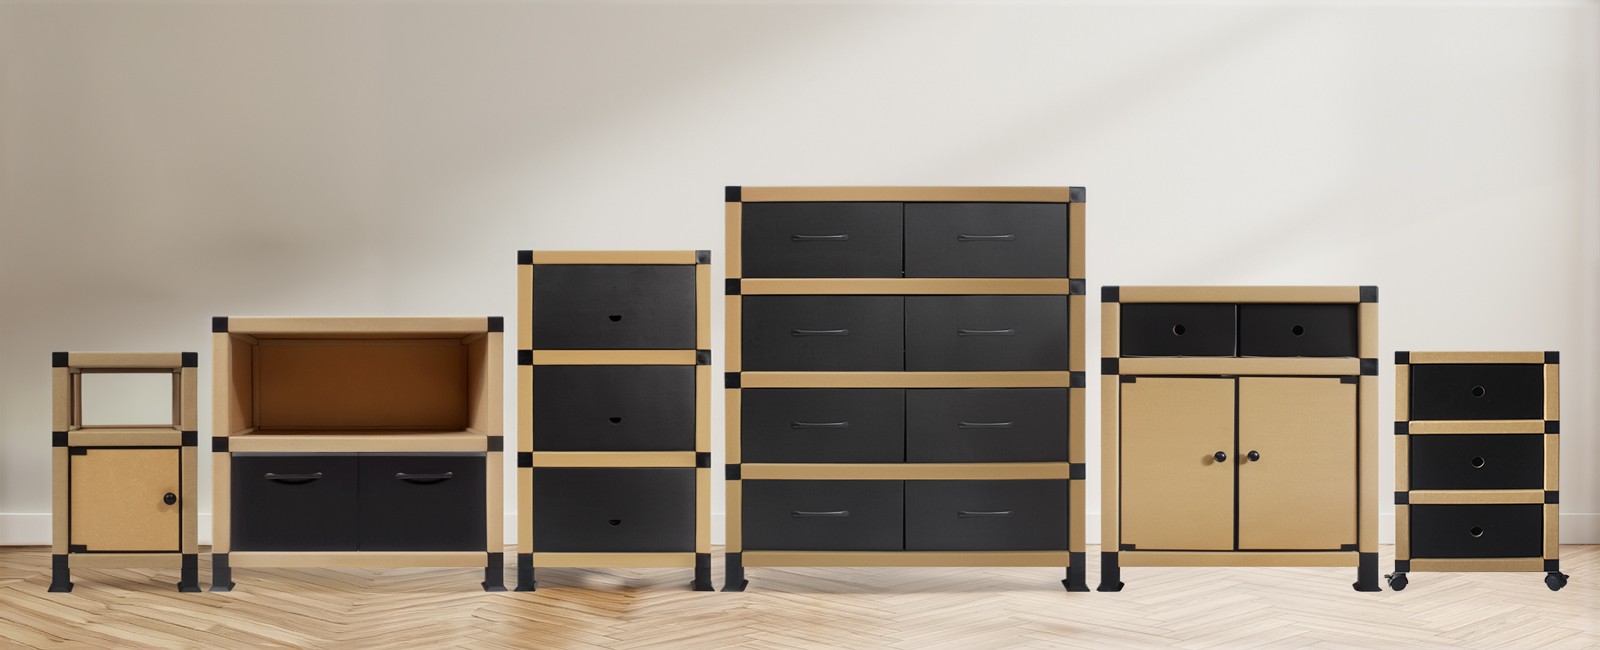
If you have just unboxed a piece of nano-coated sustainable furniture and are staring at a flat-pack of paper tubes, panels, and plastic connectors wondering what comes next, the short answer is this: you put it together the same way you snap together a set of building blocks. No screwdrivers, no Allen wrenches, no hardware bags to lose between the couch cushions.
MINHOU UNIMAX designs its entire furniture line around tool-free assembly furniture principles. Every piece, from a five-tier bookcase to a compact bedside nightstand, uses the same core system: high-strength paper tubes that slot into multi-prong polypropylene connectors. The nano-coated panels slide into pre-cut grooves. Foot covers press on by hand. The whole process typically takes between 10 and 20 minutes depending on the product.
This guide walks through the assembly process step by step, covers what to do when something does not fit quite right, and shares product-specific tips so your furniture stands sturdy on the first try.
Before connecting anything, it helps to know what each part does. Every MINHOU UNIMAX product ships with the same families of components:
Some products include additional parts: fabric or paper drawers, cabinet doors with hinge-style connectors, universal wheels with locking casters, and hanging rods for wardrobes. All of these attach using the same push-and-slot philosophy.
Step 1: Unbox and Lay Out Everything
Open the carton and remove all components. Lay them out on the floor in groups: tubes in one pile, connectors in another, panels in a third, and small accessories like foot covers and wheels in a fourth. Check against any included parts list to confirm nothing is missing. Because the furniture ships flat-packed, you will see a surprisingly small number of parts for what will become a full-size piece of furniture.
Step 2: Identify Your Connectors
Sort the connectors by type. If you are building a bookcase, you will likely use 3-way connectors at the top corners and 4-way connectors where intermediate shelves meet the uprights. For a storage cabinet with doors, you might find 5-way connectors at junctions where a shelf, two side panels, and a back panel all converge. Identifying these now prevents mid-assembly confusion.
Step 3: Build the Frame
Start from the bottom. Take the tubes that will serve as legs or uprights and insert their lower ends into the appropriate connectors. You do not need to force anything; a firm push and a slight twist usually locks the tube into the connector prongs. Work your way upward, adding horizontal tubes and additional connectors to form the skeletal frame. For a tall piece like the five-tier paper bookcase, it is often easier to build the frame lying on its side and then stand it upright once the basic structure is complete.
Step 4: Slot in the Panels
With the frame assembled, take the reinforced paper panels and slide them into the pre-cut grooves or slots on the connectors and tubes. Each panel is designed to fit a specific position, so if a panel seems too tight or too loose, double-check that you have the right panel for that slot. The panels add rigidity to the frame; once they are in place, you will feel the structure become noticeably more stable.
Step 5: Add Foot Covers and Optional Components
Press the plastic foot covers onto the bottom of each leg. If your product includes drawers, slide them into their pre-cut tracks. For cabinets with doors, attach the door panels to their hinge connectors. If your unit has universal wheels, push the wheel stems into the designated sockets on the base. The wheels on models like the paper storage containers with drawers (model UM24023A, 46 x 31 x H84 cm) typically include locking casters so you can secure the unit once it is in position.
Step 6: Check Stability
Give the assembled piece a gentle shake. All joints should feel firm with no rattling. If a tube seems loose in its connector, remove it and reinsert it with a slightly firmer push. Place the furniture on a level surface and check that it does not rock. If it does, verify that all foot covers are fully seated and that no tube is sitting at an angle.
Tall units like the five-tier paper bookcase (UM24027) benefit from being assembled near their final location. Build the frame on its side, slot in all five shelves, then carefully stand it upright against a wall. The vertical design (176 cm tall) means you want to make sure the base is stable before loading it with books. Distribute weight evenly across shelves rather than loading the top shelf first.
Compact pieces like the paper end table (UM24004, 30.5 x 30.5 x H84 cm) assemble quickly since they have fewer components. Build the four-leg frame first, then drop in the three shelf panels and the drawer. These tables work well beside sofas or beds and are light enough to reposition with one hand.
Models like the paper storage cabinet with doors and open shelf (UM24060, 67 x 42 x H82 cm) require a bit more attention during assembly because the door panels need to align with their hinge connectors. Attach the doors last, after the main frame and shelves are secure. Test the door swing before loading the cabinet to make sure nothing obstructs the opening.
Products with universal wheels, such as the paper multi-storage organizer with casters (UM24035, 65 x 37 x H76.5 cm), should have their wheels installed before the upper shelves are added. This gives you a stable base to build on and lets you roll the unit into position as you work.
| Problem | What to Do |
|---|---|
| A tube will not slide into a connector | The fit is designed to be snug for stability. Try rotating the tube slightly as you push. Check that no packing material is stuck inside the tube end. Avoid using tools to hammer it in, as this can damage the tube wall. |
| A panel feels too tight in its slot | Verify you have the correct panel for that position. Panels are cut to specific dimensions, and swapping a shelf panel with a door panel will cause problems. If the panel is correct but still tight, flex it gently along its edge to guide it into the groove. Avoid bending it sharply. |
| The furniture wobbles after assembly | Check three things: all foot covers are fully pressed on, the floor is level, and every connector is properly seated. A connector that is half-engaged will create a slight angle in the frame. Remove and reinsert any questionable joints. |
| A drawer sticks or does not slide smoothly | Make sure the drawer is inserted into the correct track and that the track itself is properly seated in its slots. Drawer tracks can shift during assembly if the surrounding frame is not yet fully rigid. Tighten up the frame connections around the drawer area and try again. |
Once your paper furniture is assembled and in position, a few simple practices will extend its service life. The company states that paper furniture commonly lasts 1 to 5 years depending on materials, construction, use, and environment, and may exceed five years under suitable conditions.
A note on weight and portability
MINHOU UNIMAX states that its furniture weighs approximately 20 to 30 percent as much as traditional furniture made from wood or metal. This is one of the reasons tool-free assembly works so well: lighter components are easier to maneuver, align, and connect by hand. It also means you can rearrange a room without calling for help.
Assembling nano-coated sustainable furniture without tools comes down to understanding the system. High-strength paper tubes, multi-way polypropylene connectors, and slotted reinforced panels work together so that anyone can go from flat-pack to fully functional furniture in minutes. No hardware, no tools, no frustration. Whether you are setting up a bookcase for a home library, a side table for a rental apartment, or a mobile storage unit for a classroom, the process follows the same six steps: unbox, identify connectors, build the frame, slot in panels, add accessories, and check stability. That is all there is to it.
If you are exploring options for your home, office, or rental space, MINHOU UNIMAX offers bedside tables, wardrobes, sofa side tables, living room cabinets, home organizers, bookcases, children's desk and seating sets, and pet houses, all built on the same tool-free platform. The company has been manufacturing paper-based home furnishings since 2009 and maintains BSCI and FSC memberships, reflecting its commitment to socially and environmentally responsible production.
